
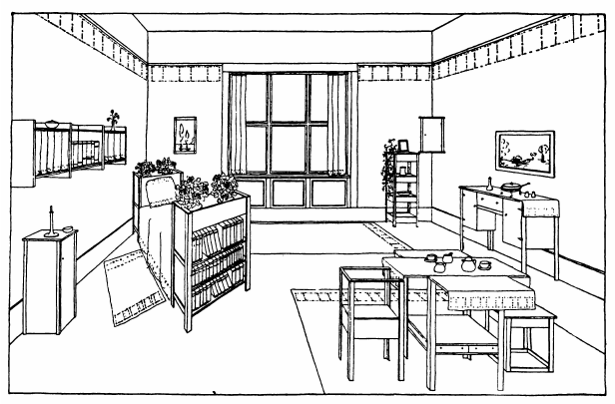
THE STUDIO
“NOTIONEITE”
LARGE WALL RACK
WINDOW-SEAT
"SILVERETI'E "
" DRESSERE'IT E
"
CHAFING-DISH TABLE.
GREEK-CROSS TEA-TABLE
DESK CHAIR
CLUB-ROOM STOOL
Color Scheme:
Black. Orange .
Woodwork:
Black paint.
Furniture:
Black paint.
Walls:
Drop Ceiling:
Same color as walls, but much lighter shade.
Hangings, Table- and Couch-covers:
Dark green, with motif stenciled in black and orange.
Curtains: Net in light orange or green, with small motif
stenciled in black.
Floor: Painted black, with rugs in Oriental colors.
Plants: Vines and growing plants with orange-colored or deep
red blossoms.
THE COVER HOLDER

Requirements:
Body.
1 Window-glass Box (about 2 1/2 in. deep, 21 in. wide, 31
in. long).
End Strips.
2 Strips 36 in.
thick, 1 in. wide, and length equal to the outside width of the box.
Bottom Strip.
1 Strip 1/2 in.
thick, 1 in. wide, and length 1 in. shorter than the outside length of the
box.
Brace.
1 Strip 1/2 in. thick, 1 1/2 in. wide, and length equal to
the outside length of the box.
Hardware.
6 brass hooks. The end strips, bottom strip, and brace may
be made from the aide.
Construction:
Remove the cover and one side. Nail one end strip placed on
its edge across each end (and both on the same side) of the cover. Keep the
outside face and the ends of the strip even with the edges of the cover. Nail
the bottom strip, also placed on its edge, extending from one end strip to the
other and along the lower edge of the holder. Place the brace across the end
strip. Screw the hooks into the body of the holder just below the brace at
points best suited for the various sizes of frying and sauce pans. The covers
placed behind the brace are sup- ported by their knob handles resting upon the
top edge of the brace.

This simple device is an excellent substitute for extra
chairs. The set has a seating capacity for nine persons, seating them according
to age or size, two children being seated upon each of the two larger benches.
Two sets were used constantly in the Sunshine Cottages
The outside
dimensions of the finished seats are as follows:

The benches are made from boxes by removing the covers and
sides, one side being replaced with a thicker piece forming the seat.
Requirements:
Bodies.
7 Boxes varying in size, but each sufficiently large to make
one of the benches. The ends of the boxes must be 8/4. in. thick and the bottoms
not more than 1/2 in. thick.

Construction:
Remove the covers and both sides from the boxes, and reduce
the remaining portion of each box to form a bench. The following table specifies
the outside dimensions of each body-piece before the addition of the seat.

Nail a seat to each body-piece of a corresponding size,
using care to have the ends of the body-piece square with the bottom, which then
becomes the back of the bench. Use 2 inch wire nails to secure the seat to the
ends. When completed, the benches should all fit one within the other as shown.
Paint or stain them any color, dark green being suggested as serviceable.
BOOK STAND

BOOK STAND
Requirements:
Body.
1 Bluing Box, 6 8/8 in. deep, 11 1/8 in. wide, 13 in. long.
Legs.
4 Stripe 8/8 in. thick, 1 1/8 in. wide, 4 in. longer than
the height of the box. 4 Strips 8/8 in.
thick, 1 1/2 in. wide, 4 in. longer than the height of the box.
Handle Arms.
2 Strips 8/8 in. thick, 1 1/2 in. wide, 3 in. longer than
the width of the box.
Construction:
Make the legs,4
inches longer than the height of the box. Remove the cover and one side of the
box. Place a leg at each corner and nail firmly, allowing each leg to project 2
inches both above and below the box. Set the heads of Tue nails well in and
clinch the points on the inside. Use a light hammer and the brad-awl if
necessary, as the material. being thin, is liable to split. Place the handle
arms flat side down on top of and across the legs, having the outer edge even
with the outside face of the legs, each end projecting equally over the front
and rear face of the legs. Use long, slender wire brads for securing the handle
arms to the legs, driven from the top through the arms into the tops of the
legs. Do not fail to place a well driven nail through the front legs into the
edge of the bottom, as indicated by the dots in the illustration.
DRESSING TABLE CHAIR

DRESSING TABLE CHAIR
The children’s chairs shown in the Nursery Interior and the
baby’s high chair in the Dining-room Interior are a smaller type of this chair
made with smaller boxes, the former having shorter and the latter longer
legs.
Requirements:
Body. 1 Canned-soup Box (about 11 in. deep, 13 1/2 in. wide,
18 1/4 in. long).
Legs.
2 Strips 1/2 in. thick, 1 1/2 in. wide, 21 in. long.
2 Strips 1/2 in. thick, 2 in. wide, 21 in. long.
2 Stripe 1/2 in. thick, 1 1/2 in. wide, 25 in. long.
2 Stripe 1/2 in. thick, 2 in. wide, 25 in. long.
Back Top.
1 Strip 1/2 in. thick, 2 in. wide, 19 1/4 in. long.
Arms.
2 Stripe 1/2 in. thick, 1 8/4 in. wide, 14 in. long.
Seat Support.
2 Strips 1/2 in. thick, 3 in. wide, 13 1/2 in. long.
1 Strip 1/2 in. thick, 3 in. wide, 17 1/4 in. long.
Construction:
Make the legs, two 21 inches and two 25 inches long. Remove
the cover and one side from the box. Cut each end down to a height of 6 inches.
Nail on the legs, allowing them all to project 15 inches below the bottom
(which is to form the seat) of the box. Place a seat support under each end,
having its edge against the bottom, and nail both ends to the legs. Place the
other support across between the front legs and nail it firmly.
Stand the chair upon its legs. Trim the top edges of the
back and the back legs until they are even, and nail on the back top. Saw off
that portion of each front leg above the seat which projects inside the end
face of the body of the chair, and fit and nail the arms on, having their inside
edges even with the inside face of the body. It will be necessary to cut the
rear end of the arm to let the rear leg- in even with the inside edge of the
arm. The front end of the arm may project 1/2 inch over the face of the leg.
FLAG WALL RACK

The collection of national flags, as seen in the Dining- room
Interior, is a pleasing Scandinavian custom. An additional charm is added to
the dining-table when, as guest, your country’s colors blend in decoration with
those of your host. The rack may also be used for pottery or plants, or the
open pockets for books, as in the Den Interior.
Requirements:
Body.
3 Condensed-milk Boxes (about 7 1/4 in. deep, 13 in. wide,
19 3/4 in. long).
Bottom.
1 Piece 8/4 in.
thick, width equal to the outside depth of the box, 10 1/4 in. longer than
three times the outside length of the box.
Facing Stripe.
2 Pieces 1/2 in.
thick, 3 1/2 in. wide, the length equal to the inside width of the box.
Junction Stripe.
2 Pieces 1/2 in. thick, 7 in. wide, the length equal to the
inside width of the box.
End Shelves.
2 Pieces 1/2 in. thick, the width equal to the inside depth
of the box, and 12 8/4 in. long.
Middle Shelf.
1 Piece 1/2 in. thick, the width equal to the in- side depth
of the box, and 18 1/4 in. long.
Pocket Partitions.
2 Pieces 8/4 in.
thick, the width equal to the inside depth of the box, and length equal to the
inside width of the box. The ends from a fourth condensed-milk box will serve
for pocket partitions.
Construction:
Remove the cover and both sides from each box. Stand the
remaining portion of all the boxes in a line end to end on their sides, with
the end and bottom edges up, having the bottoms all facing the same way, and
lay the rack bottom piece across the ends upon them, and nail it to the end
edge of the end boxes, having the end of the rack bottom even with the outside
end face of the boxes, and allow it to project ye inch over the outside bottom
face of the boxes. Set the third box midway between

the other two, with the same projection of rack bottom over
the bottom face of the box, and nail the rack bottom to the bottom edge of the
box. With the try-square set each end of each box square, and at the same time
nail through the rack bottom into their ends. Turn the piece over so that the
bottoms of all three boxes face up. Nail on the junction pieces which join the
bottoms together, and at each end nail the facing strips on the hack, having the
edge of the facing strips even with the ends of the rack. Turn the rack right
side up and fit and nail in place the pocket partitions and shelves, keeping the
tops of the shelves 3 inches below the top edge of the rack, and the pockets
all of an even width of about 5 1/8 inches.
The rack may be hung with picture wire and hooks or nailed to the wall,
as circumstances permit.
PICTURE FRAME 1

Requirements:
Body.
2 Strips 8/4 in. thick, 3 in. wide, 23 1/4 in. long. 2
Strips 8/4 in. thick, 3 in. wide, 33 in.
long.
Glass. 1 Glass 16 in. by 26 in.
Back.
1 Stiff Pasteboard, 16 in. by 26 in. 1 Piece heavy brown
paper, 18 in. by 28 in.
Construction:
The frame is quite easy to make, but care should be taken to
make the joints a good close fit. Plane the strips true and smooth, and cut the
ends perfectly square. The longer strips should measure exactly 33 inches long;
the shorter ones 23 1/4 inches long. Halve both ends of the longer ones 3
inches back, thus: and halve one end of
each of the shorter ones in the same manner, and groove out the other end of
each of the shorter ones
Keeping the outer
edge of the groove 1 1/4 inches from the end. The groove will be 3 inches wide
to receive the end of the longer strip. Wrap a piece of sandpaper around a
block, and smooth all the cuts until they fit perfectly when the strips are
matched together. A rabbet 1/4 inch wide and 1/4 inch deep must be cut in each
strip along the edge, forming the opening to receive the glass, picture, and
pasteboard backing
Making the short strips right and left-handed. Fit all the pieces together and mark and cut
the rabbet in the long strips, which will be along the edge on the uncut side
of the strip. Lay both long strips flat on their backs, parallel with each other
and about 16 inches apart. Coat each joint with hot glue and fit the side strips
in place, and hold each corner tightly together with a screw clamp. If no
clamps are convenient, put a weight (a flat- iron, for instance) upon each
corner after first using the try square to square it. Or the frame may be
fastened at the joints with four short screws set in from the back, the length
of which must be slightly less than the thickness of the frame. Insert glass,
picture, and pasteboard back, and secure with small tacks. Stretch brown paper
over the entire back, and glue or paste its edges to the frame.
en with the inside edge of the
arm. The front end of the arm may project 1/2 inch over the face of the leg.
MIRROR FRAME

Requirements:
Body.
2 Stripe 8/4 in.
thick, 3 in. wide, 38 1/2 in. long. 3 Stripe 8/4 in. thick, 3 in. wide, 19 1/2
in. long.
Mirrors.
1 Mirror Glass, 14 in. square. 2 Mirror Glasses, 7 in. wide,
14 in. long.
Backs.
1 Sheet of stiff pasteboard, 14 in. square. 2 Sheets of.
stifl pasteboard, 7 in. wide, 14 in. long.
Construction:
Halve the ends of all the strips. Each long strip must have
two grooves 1% inch deep and 3 inches wide to receive the intermediate strips.
The outer edge of these grooves will be 93/2 inches from each end of the long
strips. Cut a rabbet all around the inside edge of the frame find on both edges
of the intermediate strips. For instructions, see description of Picture Frame
No. 1
PICTURE FRAME NO 2

Requirements:
Body.
2 Stripe 8/4, in. thick, 3 in. wide, 64 1/2 in. long. 6
Stripe 8/4 in. thick, 3 in. wide, 19 1/2 in. long.
Glass.
2 Clear Window-glasses, 14 in. square.
Back.
2 Sheets of stiff pasteboard, 14 in. square. 3 Sheets of
stiff pasteboard 7 in. wide, 14 in. long.
2 Pieces heavy brown paper, 15 in. square. 3 Pieces heavy
brown paper, 8 in. wide, 15 in. long.
Construction:
Halve the ends of all the strips. Each long strip must have
four grooves % inch deep and 3 inches wide to receive the intermediate strips.
The outer edge of the first groove will be 9% inches from the end of the strip,
and the second one will be 26 inches. Cut a rabbet all around the inside edge
of the frame and on both edges of the intermediate strips. For instructions,
see description of Picture Frame No. 1
Dresserette

Dresserette
This little “Dresserette” was used in a studio for a year in
place of a dressing-table, and, as it was secured to the wall in the corner of
the room, no floor space was required for it.
Requirements:
Body.
1 Shoe Box (about 14
in. deep, 21 in. wide, 34 in. long).
Sides.
2 Pieces 1/2 in. thick, one 12 8/4 in. and one 13 1/4. in.
wide, each 28 in. long.
Shelves.
3 Pieces 1/2 in. thick, triangular shape with 1 in. added to
the depth.
Top.
1 Piece 1/2 in. thick, triangular shape with 1 in. added to
the depth.
Bottom.
1 Piece 1/2 in. thick, triangular shape with 1 in. added to
the depth.
Corner Trim.
2 Pieces 1/2 in. thick, 1 1/2 in. wide, 28 in. long.
2 Pieces 1/2 in.
thick, 2 in. wide, 28 in. long.
Door.
1 Piece 1/2 in.
thick, 15 in. wide, 28 in. long.
Door Cleats.
2 Pieces 8/8 in. thick, 1 1/2 in. wide, 14 in. long.
Hardware.
2 1 8/4 in. brass hinges (butts) and screws. 1 brass
pull-knob. 1 brass button.
Construction:
Cut the parts called for in the requirements (except the
hardware) from the shoe box. Make the
corner trim in the usual way (the same as corner legs are made) 28 inch long.
Place the top and bottom with the longest or base edge on the bench, the
triangle pointing up. Nail the widest side piece to them, having its ends even
with the outside face of both the top and bottom, its upper edge projecting 1/2
inch over the points. Fit and nail the other side piece on the opposite edge of
the triangles. Turn the piece over, laying it on one of the sides, and fit the
shelves in, spacing

them equally between the ends, using the try-square to make
them true. Plane the edge of the short
legs of the corner trim until they fit on each corner, as shown in Fig. 2, and
nail them in place. Nail the cleats across the door, put- ting one 3 inches
from each end. Fit and hang the door and screw the pull-knob and button on.
Fig. 2 shows the base of the triangle to be 18 inches, the height 9 inches, and
the length of each side 12 3/4 inches. Before cutting, 1 inch is added to the
front of the shelf to receive the corner trim.
TEA TABLE

TEA TABLE
This unique tea-table is most convenient for a small space.
It may be used as a serving-table. The two drawers are used for holding spoons
or flat silver or as trays for serving. The lower compartment is open on
opposite sides, the other two sides being closed. The drawers extend through, with
pull knobs on both ends. The leaves are hinged and fold. When in use, the
leaves are held up by swiveled arms secured to the under side of the table top.
Requirements:
Body.
1 Packing-box (about 19 in. square, 26 in. long). 2 Raisin
Boxes.
Top.
1 Piece 5/8 in. thick, 18 in. square.
Drawer Shelves.
2 Pieces 8/8 in. thick, 17 1/4 in. square.
Leaves.
4 Pieces 5/8 in. thick, 7 in. wide, 18 in. long.
Shelf Separators.
2 Pieces 8/8 in. thick, 1 1/2 in. wide, 17 1/4 in. long.
Arms.
4 Pieces 8/4 in. thick, 1 1/4, in. wide, 9 in. long.
Legs.
4 Strips 8/8 in. thick, 1 8/8 in. wide, 25 in. long. 4
Stripe 8/8 in. thick, 1 8/4 in. wide, 25 in. long.
Hardware.
8 1 1/2 in. brass butts and screws. 4 small brass knobs. 4
screws 1/4 in. in diameter and
1 8/8 in. long.
Construction:
Select a packing-box
whose ends are 5/8 inch thick, and use one end for the table top, and cut the
drawer shelf and leg strips from the sides and cover. Make the legs 25 inches
long. Make the top 18 inches square, each edge being perfectly straight and
smooth. Make the two shelves 17 1/4 inches square. Lay them upon the bench,
with the grain of the wood of both shelves running in the same direction. Place
the separators on edge at opposite sides between them and at right angles to
and across the grain of the wood of the shelves. Nail both shelves to them with
1 1/2 inch brads driven through the shelf into the edge of the separator,
having the outside face and ends of the separator even with the edges of the
shelves. Turn them upon edge and nail a leg at each corner, allowing all the
legs to project 10 inches on the same side. Stand on its legs and put on the
top, nailing it to the top of each leg, having the edges of the top even with
the outside face of the legs all around. Place the brass butts about 3 inches
each way from each corner, cutting away the edges sufficiently to let the butts
in even with the edges of the top. Fit the leaves, letting the butts into their
edges in the same way, and hang them. Bore a 1/4 inch hole through the center
of each arm 4 inches from one end, and counter-bore one side of each so that
the head of the screw will go in even. Turn the table upside down and screw the
arms on the under side of the top, placing the screw 1 inch from each edge, and
midway in the opposite direction. Make the trays from the raisin boxes and fit
them between the legs, cut- ting them down and moving in their sides and ends
if necessary. Screw two knobs on each end of each tray, placing them 1 3/8
inches from each side edge, or about 4 inches apart.
BEDSTEAD

Requirements:
Body.
1 Packing-box (about 15 1/4 in. deep, 26 1/2 in. wide, 51
in. long).
Legs.
4 Strips 1/2 in. thick, 1 1/2 in. wide, 36 in. long. 4
Stripe 1/2 in. thick, 2 in. wide, 36 in. long.
Top Frame Side.
2 Stripe 1/2 in.
thick, 2 in. wide, 51 in. long. 2 Strips 1/2 in. thick, 2 in. wide, 54 in.
long.
Top Frame End.
2 Strips 1/2 in. thick, 2 in. wide, 25 1/2 in. long. 2
Stripe 1/2 in. thick, 2 in. wide, 29 1/2 in. long.
Side Slate.
38 Stripe 1/2 in. thick, 1 1/2 in. wide, 22 in. long.
Facing Stripe.
2 Stripe 1/2 in.
thick, 2 in. wide, 48 in. long. 2 Stripe 1/2 in. thick, 2 in. wide, 23 1/2 in.
long.
Construction:
Make the legs 34
inches long. Take the box apart and reduce the depth to 7 inches outside depth
without the cover. Put the box together again and turn it on its side. Nail on
the legs, allowing them to project 12 inches below the bottom face of the box,
and 17 inches above the open top edge. Place it upon its legs and nail on the
facing strips along the bottom of the sides and ends, having the bottom edge of
the strips even with the bottom face of the box. Nail the 51-inch-long strip to
the inside face of the legs, extending it from leg to leg at opposite ends,
having its upper edge even with the top of the legs. Put the other one on the
opposite side, and put the 25 1/2 inch-long strips across the ends. Miter the
ends of the other top frame strips to an angle of 45 degrees and place them on
their flat sides on the other top frame strips, having their inner edges even
with the inner face of the lower top frame strip, and nail them together. Place
the slats on the outside face of the box, with their lower ends resting on the
facing strips, having their upper ends on the outside face of the top frame to
which they are to be nailed. Place and nail all the slats, spacing them equally
2 inches apart.
BED TABLE

BED TABLE
The table has a lower compartment, having one door for night
conveniences, upon which rests a tea-tray for serving tea or a light luncheon.
The upper section contains a revolving rack fitted with shelves carrying the
articles most frequently required by the invalid, who turns the rack at will.
Requirements:
Body.
1 Household-ammonia Box (about 10 8/4 in. deep, 18 1/2 in.
wide, 18 1/2 in. long).
Door.
Made from the aide removed from the box.
Tray.
Made from parts of a box 14 1/2 in. square.
Shelf.
1 Piece 1/2 in. thick, 18 1/2 in. square.
Top.
1 Piece 1/2 in. thick, 21 1/2 in. square.
Circular Heads.
2 Heads about 13 in. in diameter removed from a halt barrel.
Vertical Divisions.
1 Piece 1/2 in. thick, 13 in. wide, 12 in. long.
2 Pieces 1/2 in.
thick, 6 1/4, in. wide, 12 in. long.
Legs.
4 Strips 1/2 in. thick, 1 1/2 in. wide, 33 in. long. 4
Strips 1/2 in. thick, 2 in. wide, 33 in. long.
Hardware.
2 1 1/2 in. hinges
(butts) with screws. 1 porcelain pull knob. 1 brass button and screw.
Construction:
Make the legs 33 inches long. From the material forming the
above-mentioned box, make a box 10
3/4 inches deep, 18 1/2 inches square, outside
measurements, with one side left open. Turn the box on its side and nail the
legs on, allowing each one to project 3 1/2 inches below the bottom, and stand
the table upon its legs. Make the shelf 18 1/2 inches square. To prevent its
splitting, put a cleat 1/2 inch thick, 1 1/2 inches wide, across each end. Make
the revolving shelf rack by standing the wide division-piece on end, and upon
it place one of the heads, with the end of the partition extending exactly
across the center of the head, and nail them together. On each side of the wide
division and at a right angle, place also on end one of the narrow divisions
and nail through the head into its end. Turn the piece upside down and place
and nail the other head in a similar manner to. the other ends of the
division-pieces. Fit a shelf (having its outer edge curved the same as the
heads) in three of the compartments and place and secure them at varying heights
to suit any of the small articles that an invalid would require. Cut of the
heads of two 3 inch’ wire nails, and with the awl make a hole a little smaller
than the nail through the center of each head, and drive the headless nail into
the hole in each head, allowing each nail to project 3/4 inch, which completes
the rack. Enter the shelf between the legs at their upper ends, and lower and
nail it, the distance between its upper face and the tap of the legs being 1/4
inch greater than the outside length of the revolving rack. Bore a hole
(slightly larger than the headless nail) through the exact center of the shelf.
Put a small leather or metal washer (metal is better) 1/4 inch thick directly
over the hole in the shelf, and set the rack in place with the headless nail
projecting through the washer into the hole in the shelf. Make the top 21 1/2
inches square; put a cleat 1/2 inch thick, 1 1/2 inches wide, on the under side
across each end. Keep each end and the outside edge of. the cleat 1 1/2 inches
from the outside edge of the top, and it will come between and inside of the
projecting legs when the tap is nailed on. Bore a hole in the center of the top
to receive the headless nail projecting from the top of the rack, and nail on
the top, allowing it to project on all sides 1 inch over the outer face of the
legs. Fit and hang the door. Screw on the knob and button. Make a tray 14 1/2
inches square of material 3/8 inch thick. It should be about 2 inches deep on
the outside.
Leave a Comment